PLEASE NOTE THAT I NOW HAVE A NEW SHOP FOR ALL MY PRESETS AND ANY OLD POSTS REFERRING TO MY OLD SHOP ARE NOW DEFUNCTAll my presets are now here
This is a small diary of someone who loves using Nebula but hates that it is a CPU hog.
One of the most frustrating experiences with mixing in Nebula is trying to get a real time workflow. My setup comprises a powerful server and workstation. Both identical beasts from 2007 but not prepared to upgrade just for the sake of a plugin. They are choking with full resolution mixing.
The question I ask is this. What value is there to turning down the kernels in Nebula’s master page? The setting is normally at 10 and there is the option to turn that down to clean. Both machines would be set this way prior to mixing. The theory would be that I would be able to then get higher instances with much lower cpu usage. At render time I would then turn kernels up all the way to max. The idea comes about because in Sony Vegas for video – what most folks do edit in a lower resolution but render with full quality settings. Mixing or editing anything at full quality in realtime is always a strain for most programs of this kind – audio and video – especially if heavy compute-intensive plugins are employed.
I understand that mixing is intuitive and that you mix into what you get out of the monitors but the sound with the clean kernels vs the distortion version should quite similar right? Won’t we be just missing a little bit of distortion here and there due to the harmonics? Perhaps not enough to drastically shift the mix? That is what I propose.
This plugin is too good not to use but it modifies my workflow too much to simply enjoy it. By that I mean bouncing tracks all the time to just get the project to keep playing. For me, the last hurdle I have to traverse is getting nebula to play as nice as my other VST plugins without constantly dragging my system to its knees.
I did a quick subjective test here at home clean vs full and the differences existed but were not enough to stop me working. Will keep on trying to go this route over the next few days with reflections and thoughts – it shows promise but still quite a way to go yet. I tell you what it would be good to hear of possible compromises from the experts who use Nebula often. Kind regards. H
Edit – Friday session. With an Alexb console with all kernels enabled on my server one of my eights cores has 35 % usage( Alex’s libraries usually are very high quality sampled at 96 khz.) And I was using FX-teleport by the way. Now by going clean – my one core uses only 14 % . Blimey, but if I may say so myself, that is quite a power saving. Now if it translates to smooth editing then then it may be worth it to avoid the usual start stop nature of Nebula rendering. Again the idea is to edit this way and then the Kernels to full for final render. Testing continues.
Edit – Saturday. Been working on a mix today that I have had in mind to do for a few months. Not really complex at all – Piano, drums, bass, Vocals and a few instruments. And so far so goo. For the first time in my life I can mix in realtime in Sonar X1 using Nebula without having to bounce. More in depth details coming soon. Anyway – for those who are really curious – this is my current computer setup.
I need to mention that all of my work is at 96 khz by the way so I am really pushing the limits of my studio.
DAW -Sonar X1c build 319
Running on Windows 7 64 bit versions
I have two self built tower 3 Ghz intel Xeon workstations running on TYAN motherboards. These are very stable and made for servers and have server memory with error correction as well. These take Dual CPUs(Cloverton CPU) so this gives me 16 cores in total with server. The total power of two computers networked together this way is actually comparable to the top of the line very expensive Dual CPU Intel Xeon server today if one can access all the power available. That is the challenge. The server linked together give similar power to servers costing many thousands. I built my server for £ 800. An i7 based computer makes this a clever way to go. Better to have two or three cheap computers networked than one behemoth that costs an arm and a leg wisdom suggests.
The servers are networked together with 3 Gigabit Ethernet lan cables ( 3 ports teamed together by using Link Aggregation through an HP procurve 1810G-8 – this gives me more bandwith )
Both machines have 16 GBs of RAM each
Installed as well are 4 TC Electronic powercore cards – Two powercore express cards and two PCI-X. This produces a very, very stable setup. I own and still posses the fire wire but it was a waste of time for me. Badly written drivers and too many blue screens of death. I think that with Vienna ensemble pro with all its delay compensation then these DSP solutions may become very useful again.
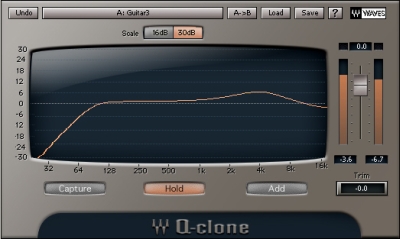
I am using the server version of Nebula on this occasion. All 3 versions of Nebula are set to Clean in the master page i.e there are no harmonics set. ( As I alluded, I will change this setting once I have finished mixing to full and then do the final bounce ). What in essence this actually does is turn nebula into a plugin like my much loved Q-clone. You will get the curve but not the distortion – so yes you can make a decent mix with decisions that remain more or less in keeping with your decisions. I would need to do repeat this in the three plugin DLLs I use. The local reverb, the local compressor version ( I use this to run eqs and other non long tail libraries ) and finally the server version – you need to leave simple mode and enter guru mode to adjust the server settings locally)
Edit – Saturday afternoon and I am finally finished going through various settings of optimizing the system. I had to go back to basics and check my Nebula xmls to make sure all was well.. 😀 . Hallelujah!!!!! So far so good!!!! I think this may be the way to go for me. I can finally do this thing without bouncing. It means I can get a little more than double the instances with this setup on the server.
I am mixing with other cpu hungry plugins as well which helps with the core balancing such as Q-clone, VSL Panner, Valhalla stuff, Waves, Lexicon and many powercore plugins.
The TC Electronic powercore stuff is invaluable as the quality is excellent with very little cpu strain. I know that they are not being developed for anymore but they are incredible value for mixing now in a hybrid way even though everything is moving towards native CPU processing. Ebay sees some cards going for like just over a hundred bucks now and some have nice plugin licenses too boot. I saw one go unsold for 80 bucks recently. Too bad I have all my slots filled up. This does actually allow me to balance my mixes without relying too heavily on Nebula for everything which is an important consideration. It also allows more cpu to be allocated to Nebula if you get my drift as less is being used on other non essential things. For example the filters of the Sonnox eq are on lots of stuff and the reverbs are high quality too.
For the first time in a LOOOOOOOOOng time while editing, I am not pulling my hair out over the joys of using nebula. It can be a bitter sweat pill to use this plugin. It sounds like no other plugin, emulating the sounds of classic, modern analog and digital hardware with aplomb. I have have observed a bit of a bug with regards to poor core balancing of the Acustica server. One core loads more than the others and when it is near its limits this leads to crackling way before the system is heavily taxed. I have even set the dspbuffer size to full as suggested by Giancarlo but this issue remained. Will watch that as the mix builds up. Also not really happy with the local CPU usage when using the server version either. I am supposed to be saving power and it seems a minimal saving. On previous excursions I have found that FX teleport uses so much less power locally so perhaps some more optimization of the server version can happen. Love the fact that the GUI is local however. Great job on that Gaincarlo. 😉
Assuming this works, why hasn’t someone thought of this before? After all this it may be that the Econo mode on the front page is the same as what I am doing. Not sure what it is for to be honest.
Edit – Saturday evening . Using the server version of Nebula. Problems. We have lots of intermittent dropouts piling up once I add more than five Server plugs. Not a deal breaker so far as I still have plenty of power on the main machine but this is not ideal. Decided that I will use the server machine for all buss work. Seems to hit my local CPU the most if I put one one the master out for example..
Edit Sunday morning – late at night. Well guys I am pleased to say that in spite of the issues this little experiment worked. I was able to get from the start of my mix to its conclusion without dealing with the usual issues surrounding needing a little more power. The mix sounds stellar and I am absolutely over the moon!!!!:D
I am of course working at 24 bit 96 khz with the server running at 20% CPU and the main machine running at 54 % beautifully balanced on the cores. In Soanr by the way and yes it also has the CPU core bug thing going on. It has had it for as long as I can remember. Task manager says that the cores are beautifully balanced but Sonar X1 insists that one core is working harder than the rest. And yes you bet – if that core gets close to max – forget having access to the rest of your ubher expensive CPU power. The system splutters, spits and grinds to a halt eventually. I still cannot believe they haven’t sorted this out after so many years. On a few non-nebula projects this issue is none existent but once I use Nebula – forget it.
4 Nebulas are on the server – doing all the buss work – as stated before – five is a no go. Tape booster, R2R and some drums presets.20 % Total CPU used.
4 Powercore cards that are almost fully loaded. Out of 4 cards 1 is free.
7 Nebulas Non-reverb on main machine doing eq and console duties.
So not a lot going on but I had previously bounced down most of the instruments via Nebula already. 29 Channels in total and managed to even run in realtime as a trial.
I certainly haven’t reached the limits yet but it seems I may not be not be far off and I am annoyed that although I have more power available I cannot access it. I am sure mixing at full res would have been tricky all the same. As an overall observation, it was so much more responsive with the kernel master setting on clean.
So what was the difference if any? Well with all the kernels initiated the whole song just gelled a whole lot more and was obviously warmer and deeper. My Mix decisions were intact however and I would not hesitate to mix this way.
Will try Monday with Reaper and FX teleport which uses up more of my server cpu without the core issue.
One of the first benefits of Reaper is that it allows the parameters of the remote FX of FX teleport to be adjusted locally. Yes it is just sliders but this is atounding. I never knew this was possible. Justin – you are a true programmer. This is such a useful feature as it means that once you have loaded a plugin you can control it locally with your local mouse.
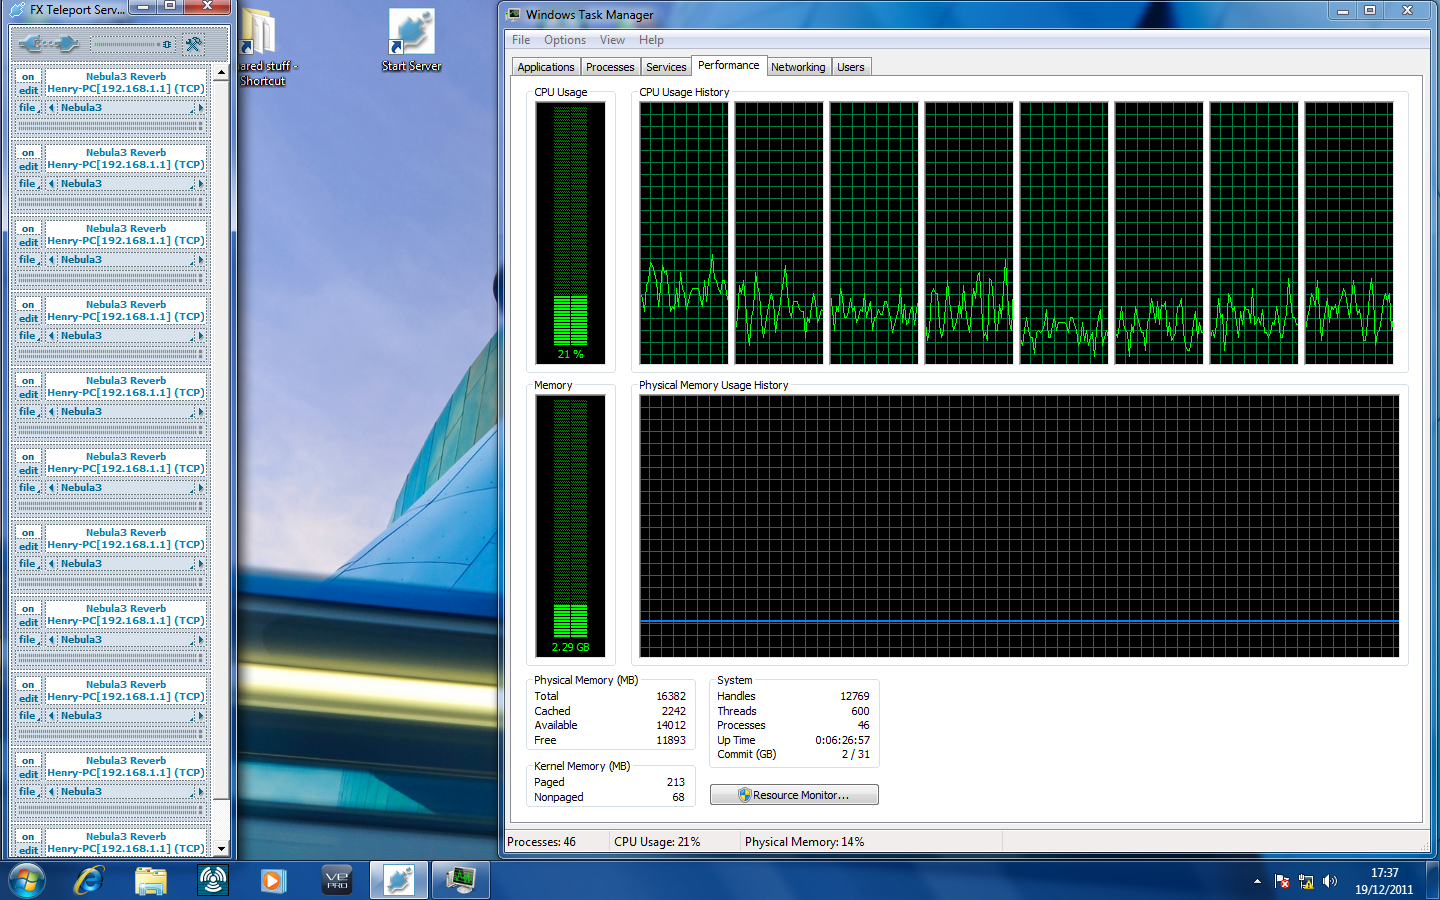
Monday evening update. Finally migrated my project across to Reaper and guess what – it is soooooooooo much better with Nebula. 24 tracks going here at 96 Khz. I am using it with FX teleport and my server has 13 Nebulas loaded. Total CPU is twenty percent and the cores are balanced beautifully. Powercores have 9 DSP chips free. Local CPU is 30 % and there is not a glitch.
In theory I could run 60 instances of Nebula with my server alone in clean mode. WOW. Practice may prove a little less but WOW, WOW, WOW!!!!!!!
Here is a screen shot of my server while using reaper. The Local screen shot is similar but at 30%. ZERO GLITCHES!!!!

Goodbye Sonar. Never again when it comes to final mixing. Smooth editing and boy is Reaper snappy.
Okay I am done testing now. Conclusions. If you have to have realtime performance with Nebula while editing, then these are my suggestions. Don’t try and mix at full resolution in realtime unless you have a super computer with SSDs, the fastest CPU available and oodles of RAM.
Try using Reaper – the snappy editing and the core balancing with glitch free playback makes other daws seem rubbish. To increase the available DSP power for nebula us FX teleport, reamote, VSL Ensemble pro or the server version from Acustica. Add one instance of the server plugin and set it to Clean only in the master page ( Kernels ). Do the same for any local plugins. Restart project. You can find your own middle ground for this. Some may get away with mixing with three kernels for example.YMMV based on how powerful your computer is. Mix in Realtime to your hearts content. Trust me – you probably won’t run out of power any time soon if your server is as powerful as your main computer.
Once finished mixing, Set one instance of the server plugin and any local plugins to Full Resolution in the master page of all your Nebula versions – Kernels setting is 10 ( 9th harmonic ) when at full res. Restart the project and render. Figure out if you are happy – bear in mind that the render with harmonics will sound somewhat smoother, fuller and more 3D depending on your emulations etc so when making mix buss plugin decisions bear that in mind.
Job done. See ya 😀
By the way I have been hesitating to make this move to Reaper myself. Having used Sonar since 1999 I have become somewhat used to using it for most audio editing but the workflow changes they put into Sonar X1 meant I was almost learning a new DAW. So I have just concluded I may as well learn Reaper. Had a licensed copy for a few years and upgraded every time but never had the incentive for the big move. Now that I have seen the power – there is no going back. For mixing I mean. Sonar is still easier for me when it comes to editing midi.
Filed under: Henry's Music by admin
5 Comments »

